DIY Sagging Interior Door Easy-Hinge Replacement and Scrap Metal Guide
- 1Over years of daily use, interior wooden bedroom doors and ABS bathroom doors often sag downward as upper hinge screws loosen in the wood jamb or hinge pins wear down.
- 2A sagging door drags across the floor or strikes the lower jamb, refuses to latch smoothly, and emits loud metallic squeaks.
- 3While hiring a carpenter costs ₩70,000–₩120,000, using non-mortise stainless steel 'Easy-Hinges' (which require zero chisel recessing), wooden toothpicks, and a screwdriver allows a solo 15-minute repair without unhanging the heavy door slab.
- 4By wedging a thick book or doorstop beneath the bottom edge and swapping the top, middle, and bottom hinges one at a time, the door remains safely supported throughout the job.
- ✓This guide covers sag diagnosis, wood-glue and chopstick hole reinforcement, cardboard shim alignment tricks, and eco-friendly disposal of rusted steel hinges (scrap metal recycling) versus wood splinters and grease rags (municipal trash bags).
Follow these steps
- 1
Diagnose Door Sag and Measure Easy-Hinge Size: Slowly close the door to check whether the top latch edge or bottom corner rubs against the frame, then measure the vertical height of the existing hinge plate (standard interior wooden and ABS bathroom doors use 75–90mm medium Easy-Hinges, while heavy solid-core doors use 100mm+ large hinges).
- 2
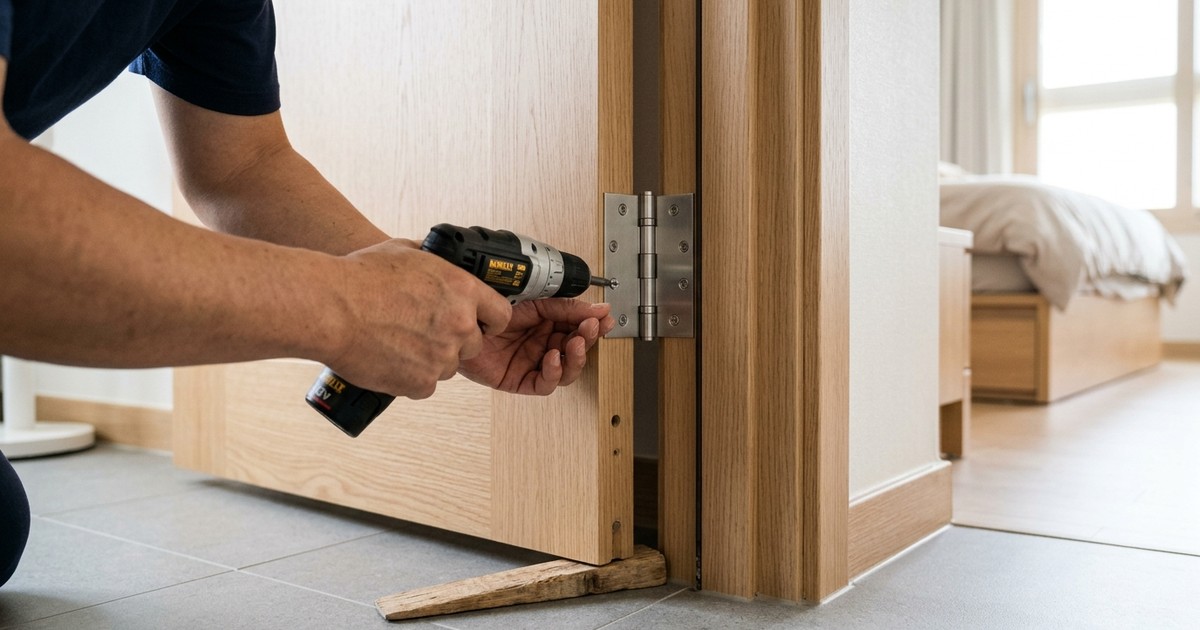
Wedge Door Bottom and Unscrew One Hinge at a Time: Open the door wide and wedge a thick stack of books or a rubber doorstop tightly beneath the outer bottom edge so the door's weight is fully supported. Never unscrew all hinges at once; remove only the top hinge first while the middle and bottom hinges hold the door upright.
- 3
Reinforce Stripped Jamb Screw Holes with Chopsticks & Glue: Door sag is most frequently caused by wallowed-out upper screw holes in the wooden jamb. Dip wooden chopsticks or 3–4 toothpicks in wood glue, tap them tightly into the stripped screw holes, and slice the ends flush with a utility knife to create a solid fresh wood core.
- 4
Install New Stainless Easy-Hinges Sequentially and Shim if Needed: Because non-mortise Easy-Hinges nest their inner leaf inside the outer frame leaf when closed, they mount flush without chiseling a mortise recess. Fasten the new top hinge to the jamb and door edge, then repeat the one-by-one replacement for the middle and bottom hinges (if slight sag remains, slip a folded business card shim behind the bottom hinge plate before tightening to lift the latch corner).
- 5
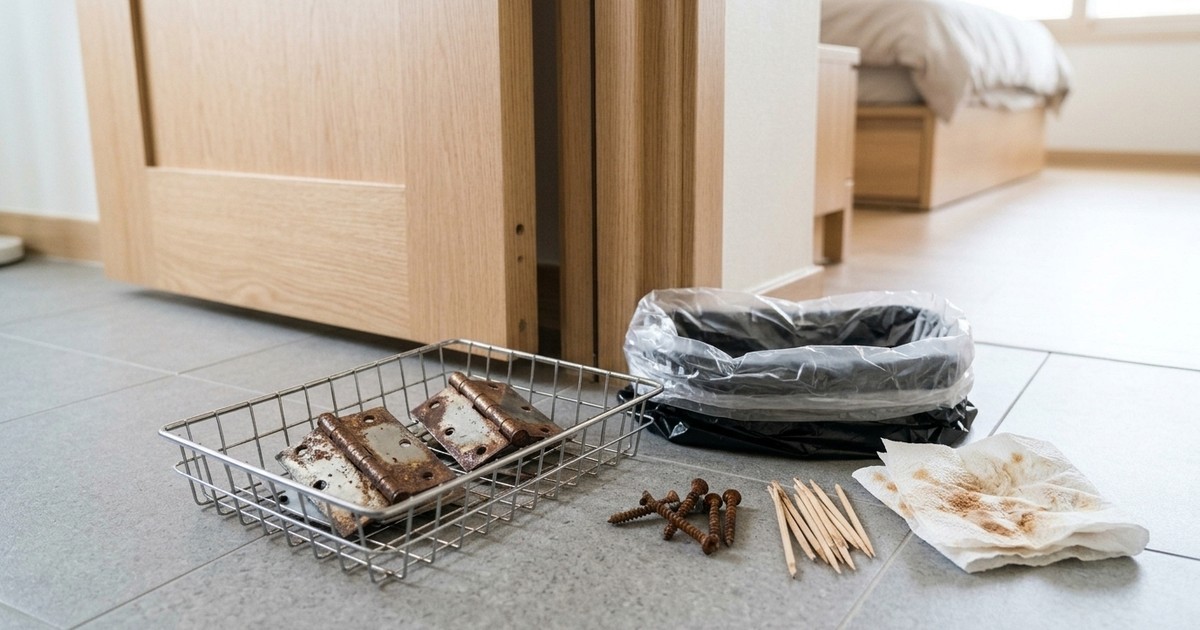
Test Door Swing and Sort Scrap Metal & Wood Debris: Remove the bottom wedge and swing the door open and closed several times to verify smooth, silent latching. Wipe black metal dust off the removed rusted steel or stainless hinges and worn screws, then place all metal hardware into curbside scrap metal/can recycling bins; bag trimmed wood splinters and soiled tissues in a standard municipal trash bag.
Frequently asked question
What is the difference between a traditional butt hinge and a non-mortise 'Easy-Hinge'?
Traditional butt hinges have two flat leaves that stack on top of each other when closed, requiring a chiseled mortise recess in the door and frame so they don't bind. Non-mortise 'Easy-Hinges' feature a cutout outer leaf and a smaller inner leaf that nests completely flush inside the cutout when closed—allowing direct surface mounting with zero chiseling.
What if the door still rubs slightly against the top or bottom frame even after replacing the hinges?
If the bottom latch corner drags on the floor or lower jamb, tighten the top hinge screws firmly and slip a folded business card or thin cardboard shim behind the bottom hinge plate on the jamb to tilt the door's latch edge upward. Conversely, if the top corner rubs, place the shim behind the top hinge plate.
How do I fix a spinning hinge screw on a plastic bathroom door (ABS door)?
Bathroom ABS doors consist of a thin waterproof polymer skin over an internal wood or foamed-PVC stile. Pack the stripped hole tightly with toothpicks coated in cyanoacrylate superglue or wood glue and drive a slightly thicker stainless screw—or simply shift the non-mortise Easy-Hinge 1–2 cm up or down onto fresh, untapped material.
How should I sort and dispose of the removed rusty door hinges and old screws?
Door hinges (steel, stainless steel, or brass) and metal screws are 100% recyclable scrap metal. Wipe off any black grease or metal shavings with a tissue and place the hinges and screws into curbside scrap metal/can recycling bins; discard soiled tissues and trimmed wooden toothpick pieces in a standard municipal trash bag.