DIY Bathroom Corner Shelf Removal, Hole Sealing & Glass Disposal Guide
- 1Bathroom corner shelves mounted on shower tiles (tempered glass and stainless/aluminum racks) endure daily hot water splashes, soap residue, and persistent humidity.
- 2Over 5–8 years, chrome plating corrodes, mold stains silicone gaskets, and plastic wall anchors loosen, causing the heavy shelf to tilt precariously.
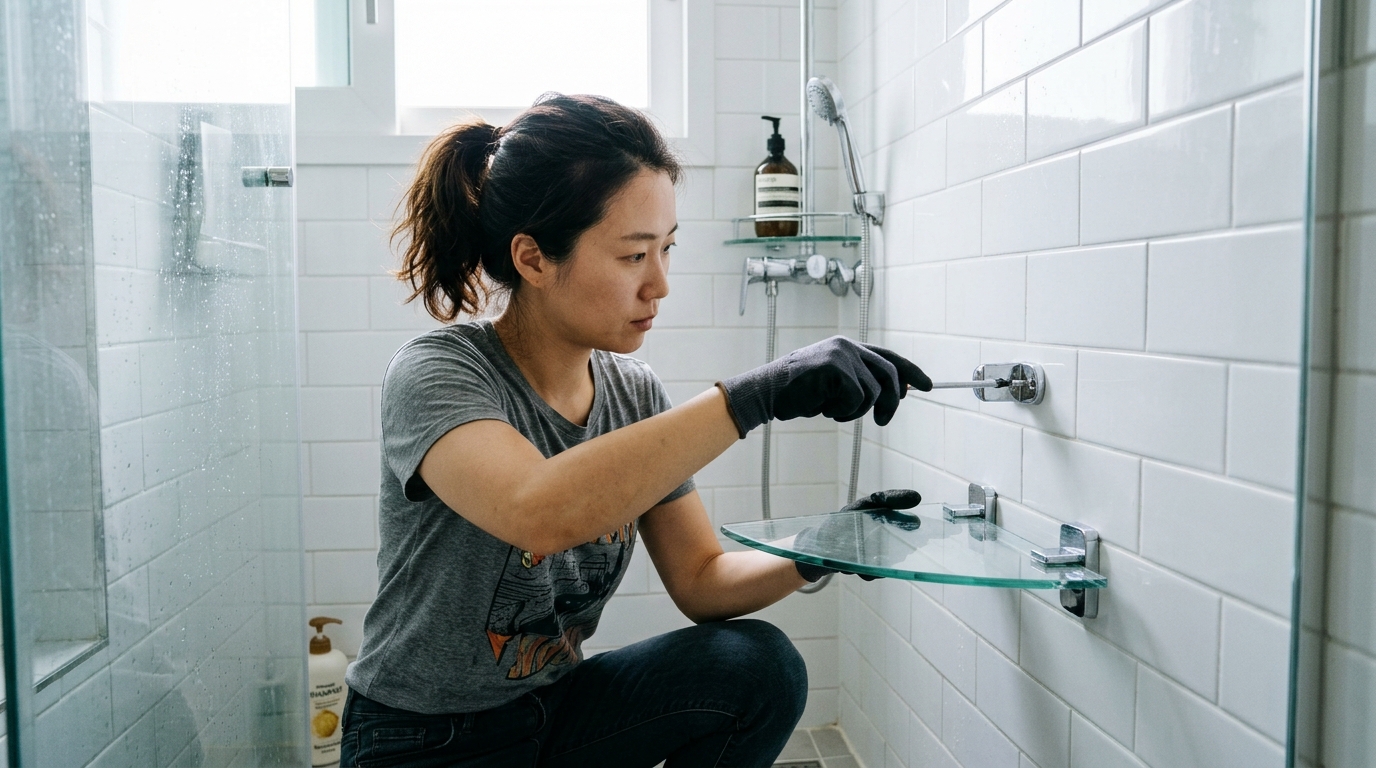
- 3Safe removal requires proactive precautions to prevent shattering: lay a thick bath towel across the shower floor to catch accidental slips, then loosen the underside set screws to slide the tempered glass shelf free before touching wall brackets.
- 4Back out the wall screws and gently extract the plastic expansion plugs using needle-nose pliers; if a plug is frozen tight, slice the exposed collar flush with a utility knife rather than prying forcefully against fragile ceramic glaze.
- 5The most critical step is hermetically waterproofing the open drill holes.
- 6Shower water penetrating empty screw holes seeps behind tiles into the porous mortar bed, triggering severe sub-wall mold and structural ceiling leaks into downstairs units.
- 7Always inject anti-mildew bathroom sanitary silicone or waterproof epoxy deep into the cavities, smoothing flush with a caulking scraper.
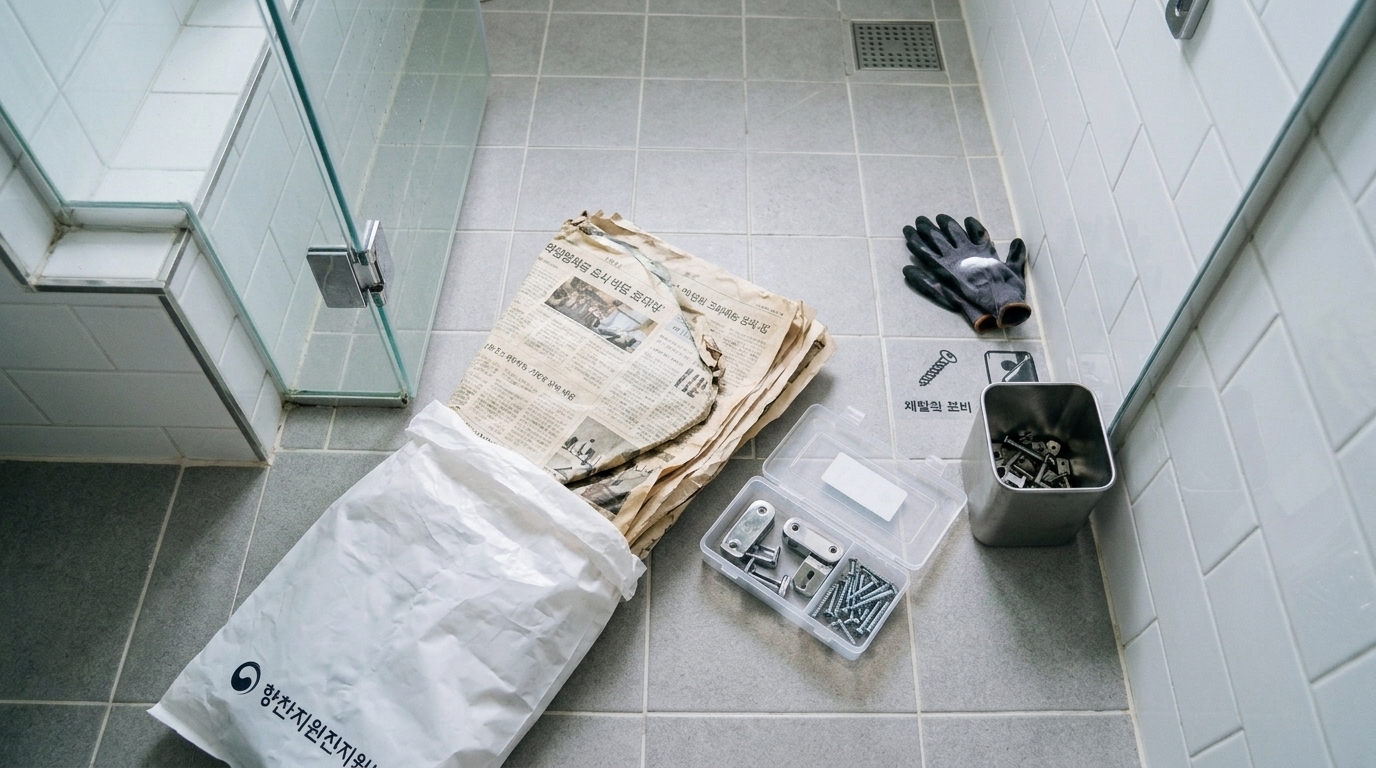
- 8For disposal, chrome/stainless steel brackets and screws belong in 100% recyclable scrap metal bins.
- ✓In contrast, thick tempered glass cannot be recycled with beverage bottles; wrap it securely in newspaper and discard inside municipal non-combustible waste bags.
Follow these steps
- 1
Step 1 (Safety Prep & Tempered Glass Removal): Spread a thick towel over the shower floor to cushion against accidental glass drops. Wear gloves, unthread the small clamping set screws located on the underside of the wall brackets counter-clockwise, and slide the heavy tempered glass shelf straight out first.
- 2
Step 2 (Unfasten Wall Mounting Brackets): Back out the main mounting screws holding the metal wall brackets against the ceramic tile using a Phillips screwdriver. If screws are seized with lime deposits, mist a drop of penetrating lubricant onto the heads, wait two minutes, and back them out smoothly.
- 3
Step 3 (Extract Wall Plugs Without Chipping Tiles): Grasp the exposed plastic rim of the wall anchor plug with needle-nose pliers, wiggling gently side-to-side to draw it out cleanly. If an anchor is cemented fast, never pry violently against tile edges; instead, slice the protruding collar flush with the tile surface using a fresh razor blade.
- 4
Step 4 (Waterproof Hole Sealing with Sanitary Silicone): Thoroughly dry the interior cavity using a cotton swab and hair dryer. To permanently prevent shower water from leaking behind tiles and causing structural moisture damage to downstairs ceilings, inject anti-mildew sanitary silicone caulk deep into each hole, scraping flush with a rubber caulking spatula.
- 5
Step 5 (Sort Metal Scraps vs Non-Combustible Glass Bag): The chrome-plated or stainless steel wall brackets and metal screws belong in 100% recyclable scrap metal bins. However, thick tempered glass cannot melt with container glass; wrap the glass slab securely in thick layers of newspaper, tape it closed, and place it into a municipal non-combustible waste bag (special woven PP trash sack).
Frequently asked question
What should I do if the small set screws under the glass brackets are rusted stuck?
Penetrating lime and soap scum seize small set screws. Dab a drop of penetrating oil (like WD-40) or vinegar into the screw recess and wait 3–5 minutes. Use a precision screwdriver that precisely matches the screw head, pressing firmly inward while turning counter-clockwise to break the bond without stripping.
Why must sanitary bio-silicone be used instead of regular acrylic caulk for sealing bathroom tile holes?
Standard water-based acrylic spackle dissolves when exposed to direct shower water, degrading within months and breeding black mold. Sanitary bio-silicone contains potent anti-fungal agents that form an impermeable, flexible waterproof barrier, permanently shielding wall cavities against moisture and mold.
Can I install a new adhesive no-drill corner shelf directly over patched drill holes?
Yes. Fill the existing holes flush with silicone and allow 24 hours of full curing. Clean the surrounding tile thoroughly with rubbing alcohol to remove residual soap oils, then mount the heavy-duty adhesive patch directly over the sealed holes to completely conceal previous drill marks.
Why can't undamaged tempered glass corner shelves be recycled with beverage glass bottles?
Tempered glass has a significantly higher melting point and different chemical composition than standard soda-lime container glass. Mixing it into glass bottle recycling batches contaminates the furnace, causing batch crystallization and defective recycled bottles. Thus, all architectural and tempered glass must be discarded in non-combustible municipal sacks.